Here we explain how to take a full cPanel backup of a web site in order to migrate that web site to a new server.
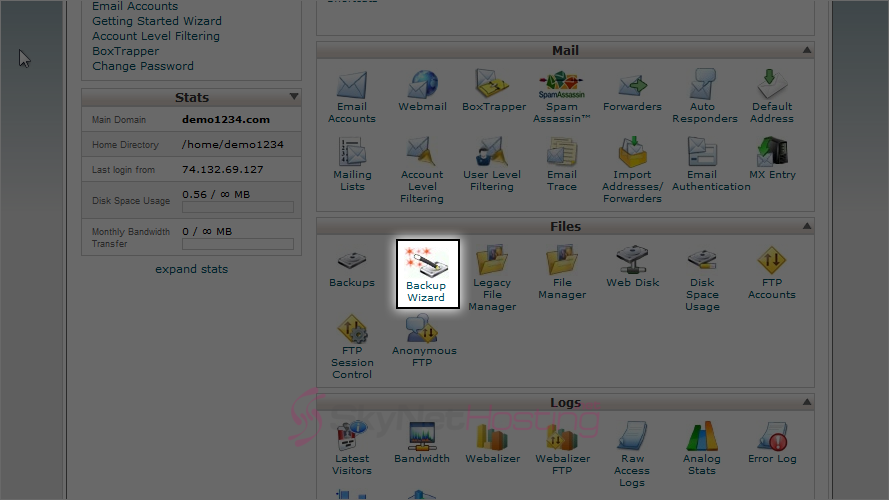
- Log into your cPanel account and locate the “Backup Wizard” icon under the “Files” section.
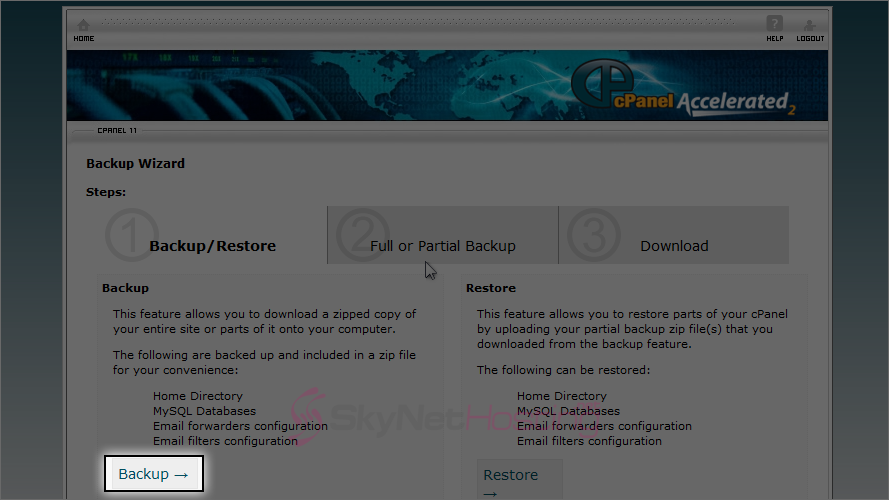
- Next, choose Backup.
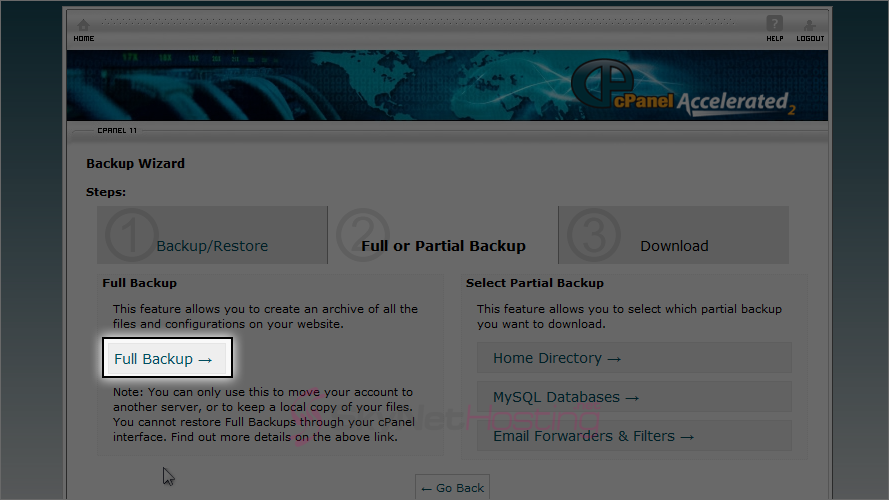
- Then choose Full Backup.
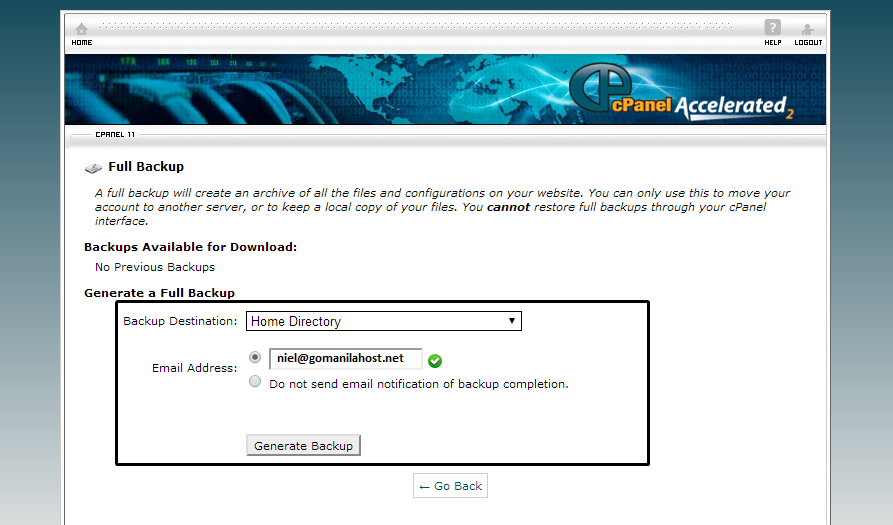
- Choose Home Directory from the drop-down list, Backup Destination. This will allow the backup to be created in the home directory of the Cpanel account. For options on Email Address: select the first option and enter an email address. When the backup has been created, an email will be sent to this email ID, hit Generate Backup.
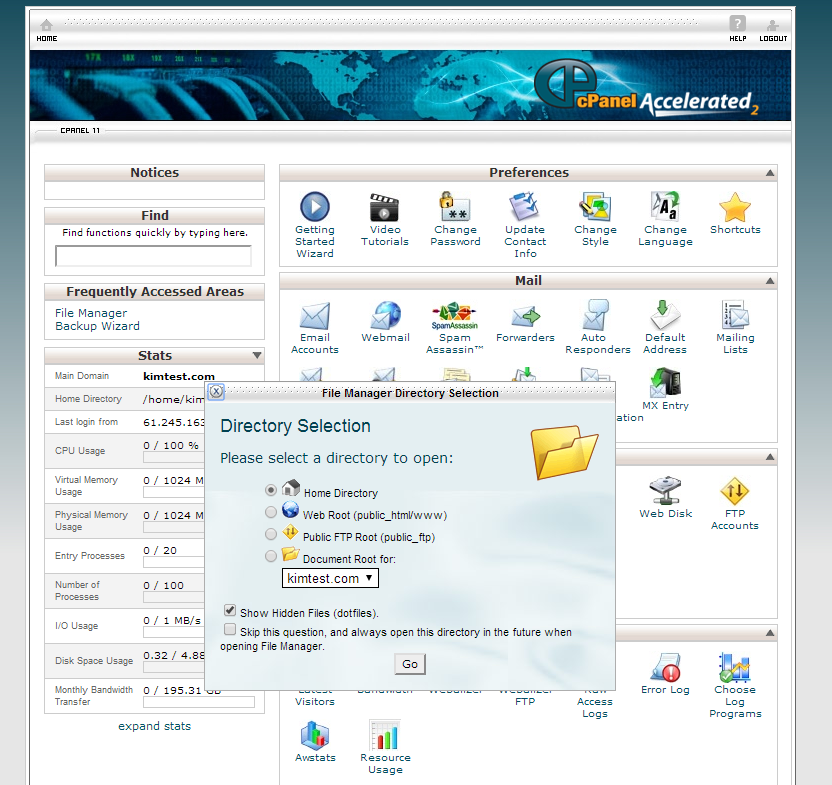
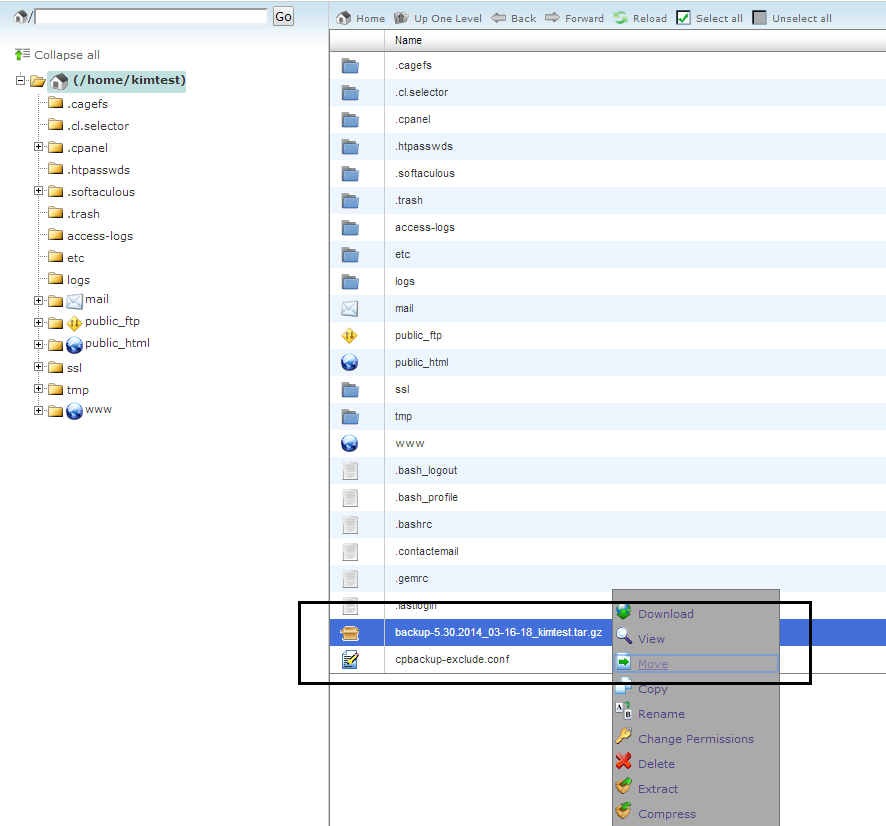
- Once the backup has been created, go to File Manager of cPanel and select the Home Directory option.
- Scroll and locate the backup you just created and left-click on it. Select the Move option.
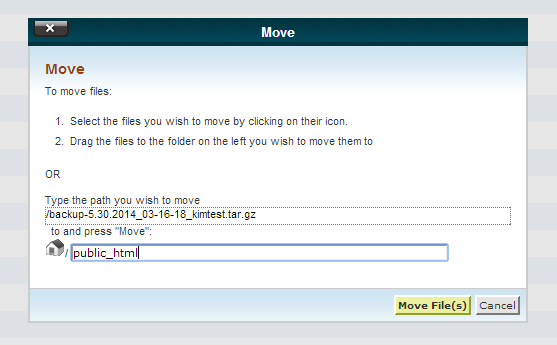
- Enter public_html as the path and hit Move File(s).
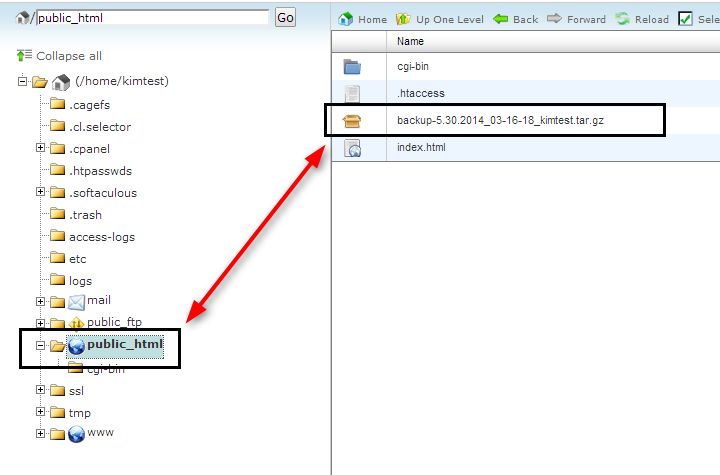
- Now go to the public_html folder and find the backup which was moved.
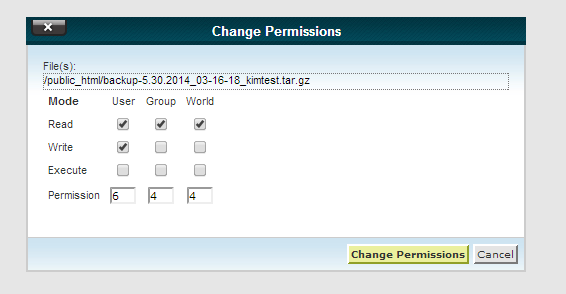
- Right-click on the backup and choose the Change Permission option. Select the checkboxes to get the value 644 and hit on the Change Permission button.

- Select the checkboxes to get the value 644 (shown below) and hit on the Change Permission button.
- Now the backup created is in downloadable format. The downloadable link should look similar to: http://your_domain/backup.tar.gz. Paste the backup URL on the web browser and you can download it easily.
