STEP 1Contact Form Plugin Installation
We will begin with the installation of an additional plugin called “Contact Form 7” this is a trusted plugin distributed at the official WordPress website. You can find the plugin at the official WordPres plugins page.
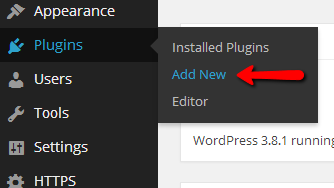
or directly search for it in the WordPress plugin installation area located in your WordPress admin area > Plugins > Add new.
If you are not quite sure how to install and activate the plugin you can check one of our other WordPress series tutorial related to the management of your plugins.
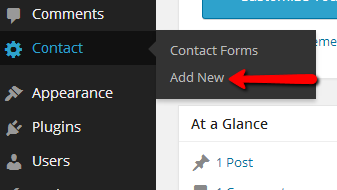
Once you have the plugin installed you will be presented with a new admin menu item called “Contact”.
STEP 2Add new Contact Form
Now let’s add a new contact form. If you hover over the new menu you will be presented with two additional submenu items – Contact Form and Add New. Click on the Add New button so you can add your own custom Contact Form.
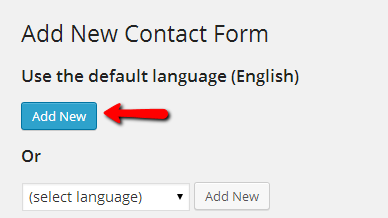
On the next page you will need to select the default language of the contact form and then you should press the Add New button so you can begin configuring your new contact form.
On the next page you will be presented with quite a lot of options, however you will need to configure only few of them to get a working contact form for your website.
First you should begin setting the name of the contact form. For this purpose you will need to click on the “Untitled” headline at the top of the page and fill the name of your contact form. If you would like to use a really simple contact form you can click on the “Save” button and you will be presented with the shortcode you will need use.

However if you are looking for more custom designed contact form you should proceed with the settings on this page.
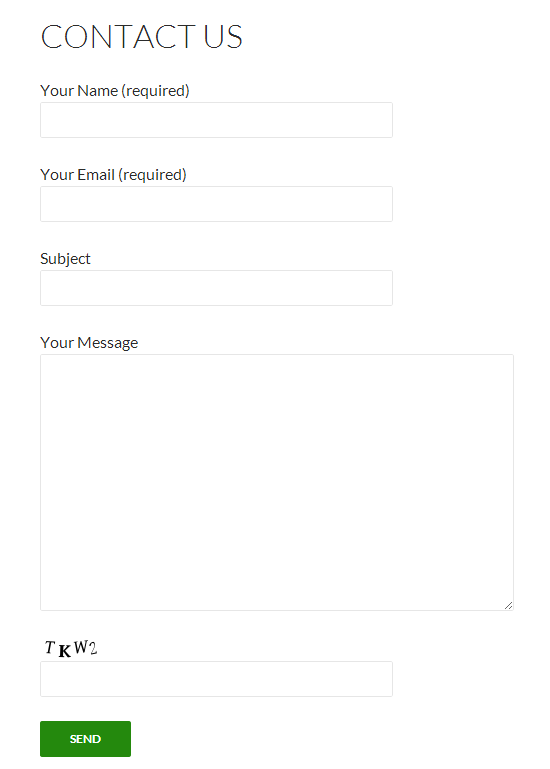
The next setting is what will be actually displayed on your contact form. By default your new contact form will contain the following 5 fields:
- Your Name – The name of the person using this contact form on your website
- Your Email – The email of the person using this contact form
- Subject – The subject of the contact action
- Your Message – The actual message you will receive from the person submitting the form on your website
- Submit – The submit button for the contact form.
If you would like to add some other elements to the contact form you can use the “Generate Tag” dropdown menu next to the form code.

For the purpose of this tutorial we will add an additional tag for the CAPTCHA protection of the contact form.
STEP 3Secure your Contact Form with Captcha
This can be done quite easily if you click on the Generate Tag drop down menu and select theCAPTCHA tag. Then you will be presented with quite a lot of configurations for the captcha feature but most importantly you will notice that there is an additional plugin required for the captcha to work.

The plugin is called “Really Simple CAPTCHA” and you will be able to easily install it if you go back to the Install plugins section (Plugins>Add new) and search for the “Really Simple CAPTCHA” plugin.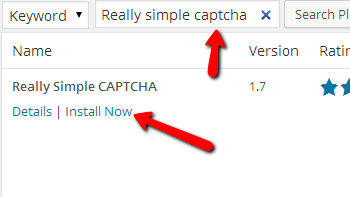
Once you install and activate the plugin it is time to go back to your contact form configuration. If you haven’t saved the contact form you were previously creating you should add a new contact form following the instructions we have provided earlier in this tutorial, however this time you will be able to add the CAPTCHA feature to your contact form.
The process of adding the CAPTCHA feature is fairly simple. Once you select the CAPTCHA tag from the dropdown menu Generate Tag next to the form code you will notice at the bottom of the newly appeared configuration interface for your CAPTCHA feature the following lines: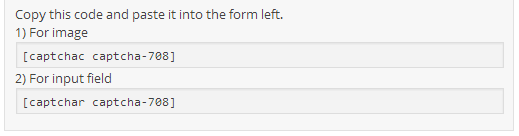
Simply copy/paste those lines in the form code before the submit button so the image code and the text field where the code should be presented can be placed just before the form submission.
Once you hit the Save button at the top of the page you will be presented with the shortcode of your contact form.
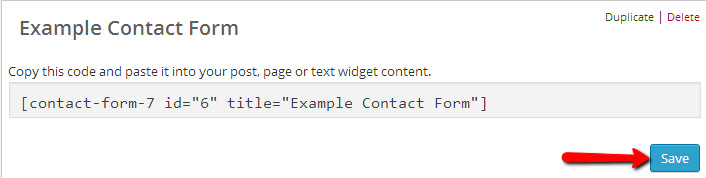
Copy that code and paste it wherever you would like your contact form to appear (e.g. posts or pages).
Finally if you are done editing how your contact should look like and what features it should contain you should actually add the form to your “Contact Us” page.
STEP 4Add the Contact Form to your Contact Us Page
If you haven’t create that page already now it’s the time to create it via your admin dashboard by going into Pages>Add New. If you are not quite sure how you should manage the pages on your website you can check our other tutorial on that matter.
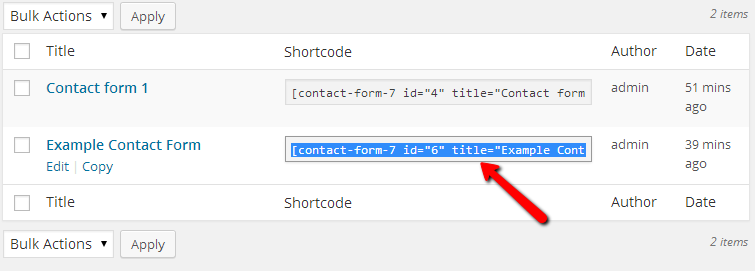
In order to actually display the contact form you will need to use the generated shortcode for the contact form exclusively. If you haven’t copied the shortcode earlier you can navigate to the home page of the contact forms plugin by going to Contact>Contact Forms. There you can get the shortcode of the form you would like to use.
Copy that code and paste it into the Contact Us page content.

Once you publish your Contact Us page you will be able to see the contact form when you access the page on your website.
Congratulations! You can now create a Contact Us page for your website in WordPress!
