STEP 1Adding Categories
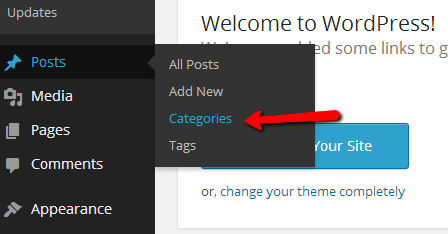
The process itself is fairly simple as anything else in WordPress and in order to access the Categories editing page you will need to login into your WordPress admin area and navigate to Posts>Categories.
Once you access the Categories page you will notice that the page is separated vertically on two parts. The first part is for adding a new category. There are few fields presented on this part of the page and we will address them all.
- Name – The actual name of the category. Note that this will be shown on your website if the option for displaying the categories is enabled of course.
- Slug – The URL friend name of the category. This name will be displayed in the URL when certain category is accessed.
- Parent – If the newly created category will be a child or sub category to already existing category this drop down is exactly for choosing the Parent category.
- Description – The description of a category. Note that this is not mandatory however some custom template you have downloaded might be showing this item.
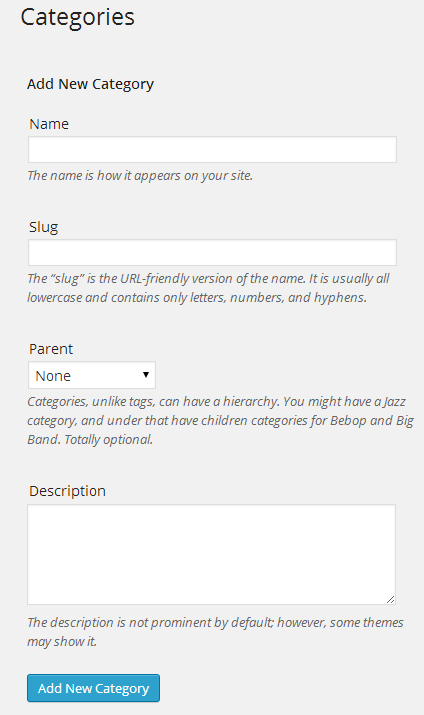
Once all these fields are filled please use the Add New Category button at the bottom, bellow theDescription field.
STEP 2Editing Categories
The second part of the Categories page is displaying the already created categories. In this half you can edit and delete already existing category.
In order to edit an existing category you should hover over the category and press the newly appeared link Edit.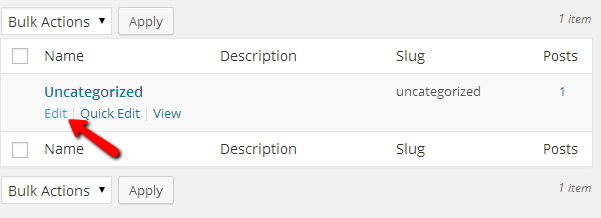
That option will redirect you to a page which is exactly the same as the left part of the Categories page for adding a category with the simple difference that the fields Name, Slug, Parent and Description will be already filled with the current information for the category you are editing.
The last thing we need to discuss in this tutorial is how to delete a Category. As all other discussed actions in this tutorial this is also quite simple for achieving. Simply go to the home page of your categories and pay attention to the right part of the screen where the currently existing categories are listed.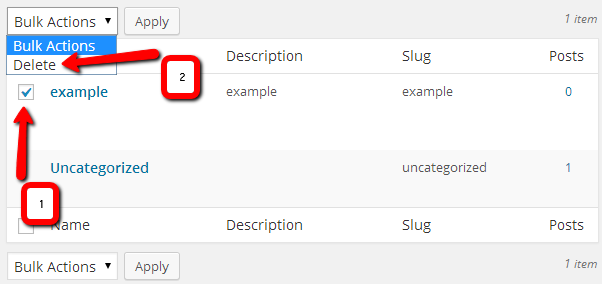
First you will need to use the checkbox of the category you would like to delete and then use the Deleteaction from the dropdown list. Once you hit the Apply button the category you have selected will be permanently deleted.
Congratulations! You can now fully manage the categories on your website!
