Since WordPress allows you to upload large amount of files using the media manager you will of course need some way of managing those outside your “Posts” and “Pages” pages.
In this tutorial we will provide you with detailed explanation on how to manage those contents easily and most importantly separately from the other WordPress features.
STEP 1Adding media content
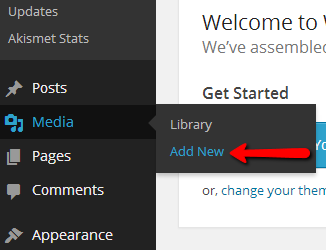
We will begin with how you should add media contents to your website. In order to add media content you will need to login inside your WordPress Admin area and navigate to Media>Add New.
Then you will be redirected to a page where you will be able to directly upload media content by either drag-and-dropping the content or to select the files you would like to upload using the Select Filesbutton.
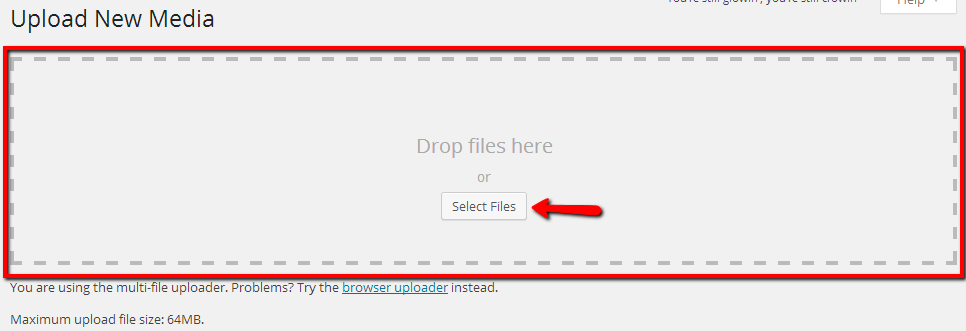
Once you select the file or drag-and-drop it, the file will be automatically uploaded.
If you would like to browse all of the uploaded files or to edit them you will need to navigate this time toMedia>Library.
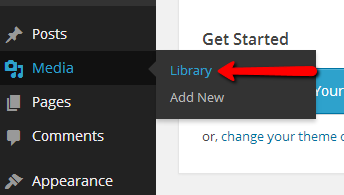
On that page you will be presented with the already uploaded media contents in a table view positioned at the whole page.
STEP 2Editing and Deleting media content
If you would like to edit certain media item you will need to hover over its name and to use the Edit link.
The Edit link will redirect you to a single page where all of the information for the concrete item you are editing will be presented. The components you can edit are:
- The media item itself
- Caption
- Alternative Text
- Description
Once you are done updating the component simply use the Update button located at the right block on that page.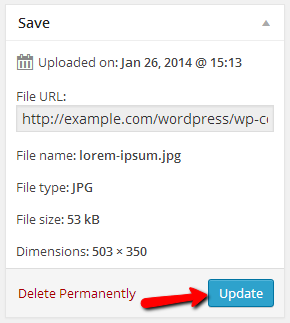
And the changes will be saved successfully.
Last but not least if you will need to delete a media content you will need to go back to the Media Library page (Media>Library). Once there you will need to locate the media content you would like to delete and to hover over it so the Delete Permanently link can appear.
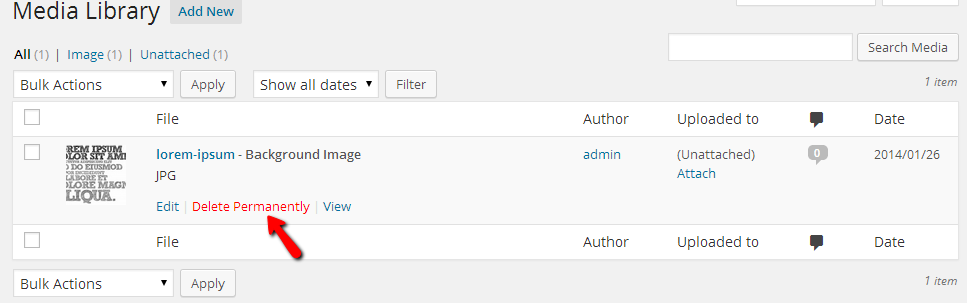
Use that link and the content will be permanently deleted.
If you would like to delete multiple items at once you will need to check the checkbox for all of the media components you would like deleted and then use one of the drop-down “Action” menus located at the bottom or at the top of the page by selecting the Delete Permanently menu element.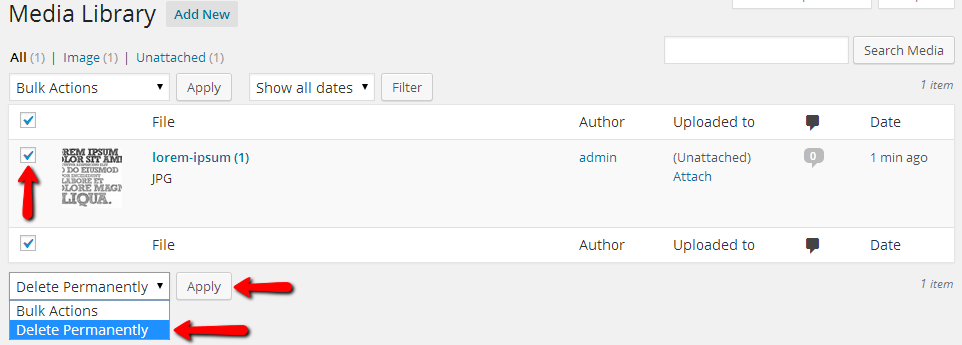
Once you press the Apply button all of the elements you have checked will be permanently deleted.
Congratulations! You can now fully manage the media contents of your website!
