By default WordPress is not configured to use SSL certificate no matter the fact that your domain might be using such. The configuration however is quite an easy and straight process which if you follow this tutorial you will be able to handle on your own.
In this tutorial we will mostly discuss how to configure the plugin required for the SSL certificate. You will need to know of course how to install a plugin in your WordPress, however if you are not convinced that you are fully aware how this process should be handled please refer to another article from our WordPress series related to the management of your plugins.
STEP 1Installing the SSL plugin
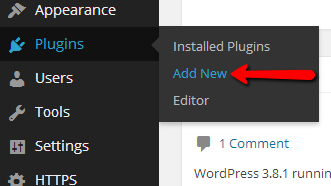
First we will begin with installing the plugin for the SSL activation and configuration of your website. This can be quite easily achieved if you login into your WordPress admin area and navigate to Plugins > Add new.
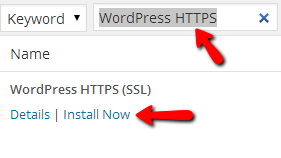
Then you will need to type the following string in the search box:
“WordPress HTTPS”
This is the actual name of the plugin you will be using and if you click on the “Search Plugins” button the first result you will be provided with will be the one you will need to use. In order to install the plugin you will need to click on the “Install Now” link bellow the plugin name from the search result you will be provided with.
Once the plugin is installed and activated it will automatically add a configuration link to your WordPress admin menu sidebar. Please use the newly created menu element in order to access the configuration page for that plugin so you can configure it.
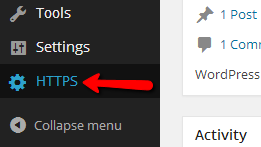
This menu element will lead you to the configuration page for your SSL certificate and its activation on your website.
STEP 2Configuring the plugin and enabling the SSL
On that page you will need to start with the settings from the top to the bottom. There are the following fields under the “General Settings” interface.
- SSL Host – There are actually two fields you will need to fill under this setting. The first one is the domain name(SSL Host) your websites uses and the second one is the Port your SSL certificate is available on. This is usually port 443.
- Force SSL Administration – This setting is for forcing all pages under the admin area of your WordPress platform to be accessible only with https.
- Force SSL Exclusively – This is for forcing the pages which are not secured by the Force SSL option or “Secure Post” checkbox available already on every post to be redirected to https.
- Remove Unsecure Elements – This will remove all of the elements which are not requested by https protocol on your page.
- Debug Mode - An easy to use debug mode for your SSL plugin.
- Proxy – This setting is only if you are browsing your website via a proxy.
- Admin Menu Location – Where the link for the ssl plugin should be located inside your WordPress admin area.

Once you are done with these settings please use the “Save Changes” button and you are ready to use your SSL.
Congratulations! You have successfully activated SSL certificate for your website!
